Python RAG Tutorial for Beginners (LangChain + Ollama + FAISS + Hyperparameter Tuning)


What if we could take a language model, and turn it into an expert on something it has never seen before? Not by teaching it, but by giving it fast access to documents.
Like a serious investigation into whether Lord Elrond from The Lord of the Rings is secretly Agent Smith from The Matrix. That's exactly what we'll do today!
In this crash course, we're going to build a complete Retrieval-Augmented Generation (RAG) pipeline in Python from start to finish. We'll take a powerful language model and give it access to witness reports, testimonies, and forensic evidence, turning it into a brilliant investigator fully familiar with the case.
Along the way, we'll learn about chunking, embeddings, vector databases, and retrieval, using ten fan-fiction documents I created specifically for this project. We'll combine Ollama, LangChain, FAISS, and tiny Qwen (so tiny, it can even run on your CPU), giving you a solid foundation for building your own expert systems.
By the end of this tutorial, you'll fully understand how Retrieval-Augmented Generation works, and you'll have all the knowledge you need to build your own document-powered AI applications... or hilarious projects like this one.
So if you're ready—let's start coding.
Video Walkthrough - Watch the Full Tutorial
Before we begin, if you get stuck throughout the workflow and not sure what to do - please refer to my video tutorial, where I show everything step by step:
Complete video walkthrough: Build a local Retrieval-Augmented Generation (RAG) application with Ollama, LangChain, FAISS, and Docker—perfect if you prefer learning by watching.
Environment Setup
Starter Files & WSL Terminal Setup
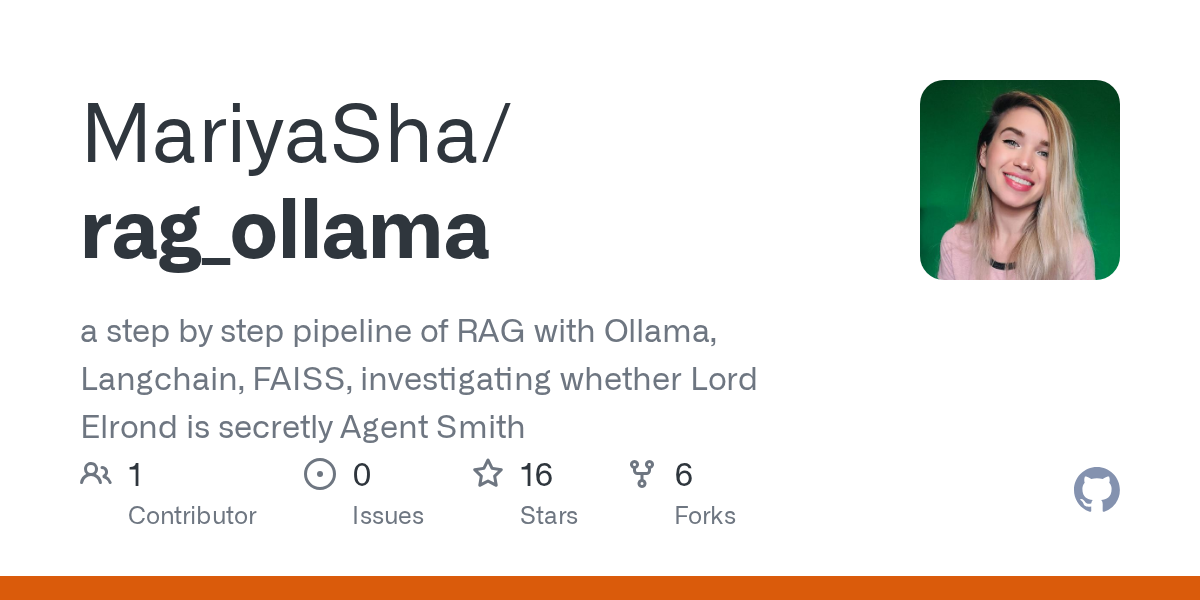
So first things first, let's download our project files from GitHub: https://github.com/MariyaSha/rag_ollama
We have 10 PDF documents full of evidence, some defending Elrond and some accusing him. And if there's one document you wanna read - make sure it's Sauron's testimony. I had a lot of fun writing that one.
So let’s save them in a project folder named RAG on your WSL file system. If you don't have WSL yet, check out this video:
New to WSL? Follow this step-by-step tutorial to install Windows Subsystem for Linux, Miniforge, Conda, and Python so your development environment matches the one used throughout this guide.
And also make sure our documents are stored in an additional folder named data, just like in the files you downloaded from GitHub.
Ollama Setup
Then, we will open a WSL terminal, and we will install a very important tool named Ollama.
It runs language models directly on our computer. It does it for free, while giving us full control. Just copy this Linux install command, and paste back in WSL.
curl -fsSL https://ollama.com/install.sh | shNote: The above command is the current Ollama Linux installation method for June, 2026. However, if it changes in the future, please refer to an updated command on Ollama.com.
Now once we have Ollama installed, we will download two very small models to our system - Qwen 2.5 and BGE-M3.
Download Chat Model
We will start with the chat model - the one we will turn into an expert.
We will download a very small and compact version of Qwen, an open source model, so it can run on many computer systems without requiring payment, or a fancy GPU or a lot of free storage space. We will download my personal favorite - Qwen in version 2.5 with 1.5 billion parameters:
ollama pull qwen2.5:1.5bNote: downloading a bigger version of Qwen will improve your final RAG results. You'd be able to ask the model ambiguous questions about the investigation and get proper responses. If the model is small - you'd have to be very specific with what you ask to avoid hallucinations. So if you have the storage space and computational hardware (an NVIDIA CUDA capable GPU) - please explore bigger versions of Qwen 2.5 with: 3b, 7b, 14b, 32b, 72b parameters.
For example, if you have an NVIDIA RTX 4080 GPU (16 GB of VRAM), the highest I'd go is qwen2.5:7b, installing it with:
ollama pull qwen2.5:7bAnother example, if you have an NVIDIA RTX 5090 GPU (32 GB of VRAM), the highest I'd go is qwen2.5:32b, installing it with:
ollama pull qwen2.5:32bDownload Embeddings Model
We will also need a second model for something called "embeddings". We'll cover it shortly, but it basically organizes the text in our documents and makes it easy to search. So in our case we will install a model named bge-m3 with:
ollama pull bge-m3 Now once we have both models on our system - we will take care of the working environment.
Conda Environment Setup
In our terminal, assuming you installed Conda Forge - as instructed in my WSL video tutorial from above - we will proceed with setting up a virtual working environment.
We do so to encapsulate all the requirements and dependencies in our project, making sure they do not interfere with other software and Python versions we already have installed on our system.
Create Environment
So first, we will create a new working environment named rag_env and Python version 3.12 with:
conda create -n rag_env python=3.12Then we will activate it with:
conda activate rag_envAnd we will also navigate to our RAG project folder, where our data directory lives:
cd path/to/RAG/folderHow do you know you're in the right folder? if you list all the files in the current directory with:
lsthe terminal will return your data folder, and if you list all the files in the data folder with:
ls dataYou'll get the names of our documents:
'00 Case Index.pdf'
'01 Case Summary.pdf'
'02 Anonymous Witness Report.pdf'
'03 Testimony of Sauron.pdf'
'04 Testimony of Aragorn II Elessar.pdf'
'05 Cultural Preservation Interview – Lady Galadriel.pdf'
'06 Personal Journal Entry of Legolas Greenleaf.pdf'
'07 Genetic Lineage Analysis Report.pdf'
'08 Scientific Analysis of the Matrix Hypothesis.pdf'
'09 Official Statement of Mithrandir Gandalf the White.pdf'
Install Requirements
Next, we will install a whole bunch of dependencies that we will use in our project. At this point you'd have to make a decision whether to run the workflow on CPU or GPU, as it requires different installation commands. The rule of thumb is:
- If you don't have a GPU - your CPU will work just fine because our models are very small and we are dealing with 10 documents rather than thousands of them.
- If you have an NVIDIA CUDA capable GPU - you should always use it, because the workflow will generally run faster. The speed differences between will grow as you add more documents or use bigger models, but for the current workflow, shown in this article, the speed difference will not be significant.
Requirements for RAG on CPU
To install the requirements for a CPU workflow, copy the following command and run it in your WSL terminal:
pip install \
    langchain \
    langchain-community \
    langchain-ollama \
    langchain-text-splitters \
    faiss-cpu \
    pypdf \
    jupyter
Where LangChain helps us talk to Ollama from Python, FAISS stores our embeddings, PyPDF reads our PDFs, and Jupyter is where we write the code.
Requirements for RAG on GPU
To install the requirements for a GPU workflow, most of the modules are a perfect match to the CPU requirements, other than FAISS.
pip install \
    langchain \
    langchain-community \
    langchain-ollama \
    langchain-text-splitters \
    pypdf \
    jupyter
To install FAISS on GPU, we will run the following command:
conda install -c pytorch -c nvidia -c conda-forge faiss-gpu=1.14.3Note: The above command is the current FAISS-GPU installation method for June, 2026. However, if it changes in the future, please refer to an updated command on the official FAISS GitHub page.
Launch Jupyter Lab IDE
Finally, we will launch our development environment - Jupyter Lab with the following command:
jupyter lab And we will navigate to the URL returned by the terminal, create a new notebook in the same directory as our data folder, and we can officially start coding!
Module Imports
Let’s start by copying the following module imports so we don't have to think about them later:
from langchain_community.document_loaders import PyPDFLoader
from langchain_text_splitters import RecursiveCharacterTextSplitter
from langchain_community.vectorstores import FAISS
from langchain_ollama import OllamaEmbeddings, ChatOllama
from langchain_core.prompts import ChatPromptTemplate
from langchain_core.output_parsers import StrOutputParser
import os
Once the modules were copied, run the first cell in your notebook with Ctrl + Enter.
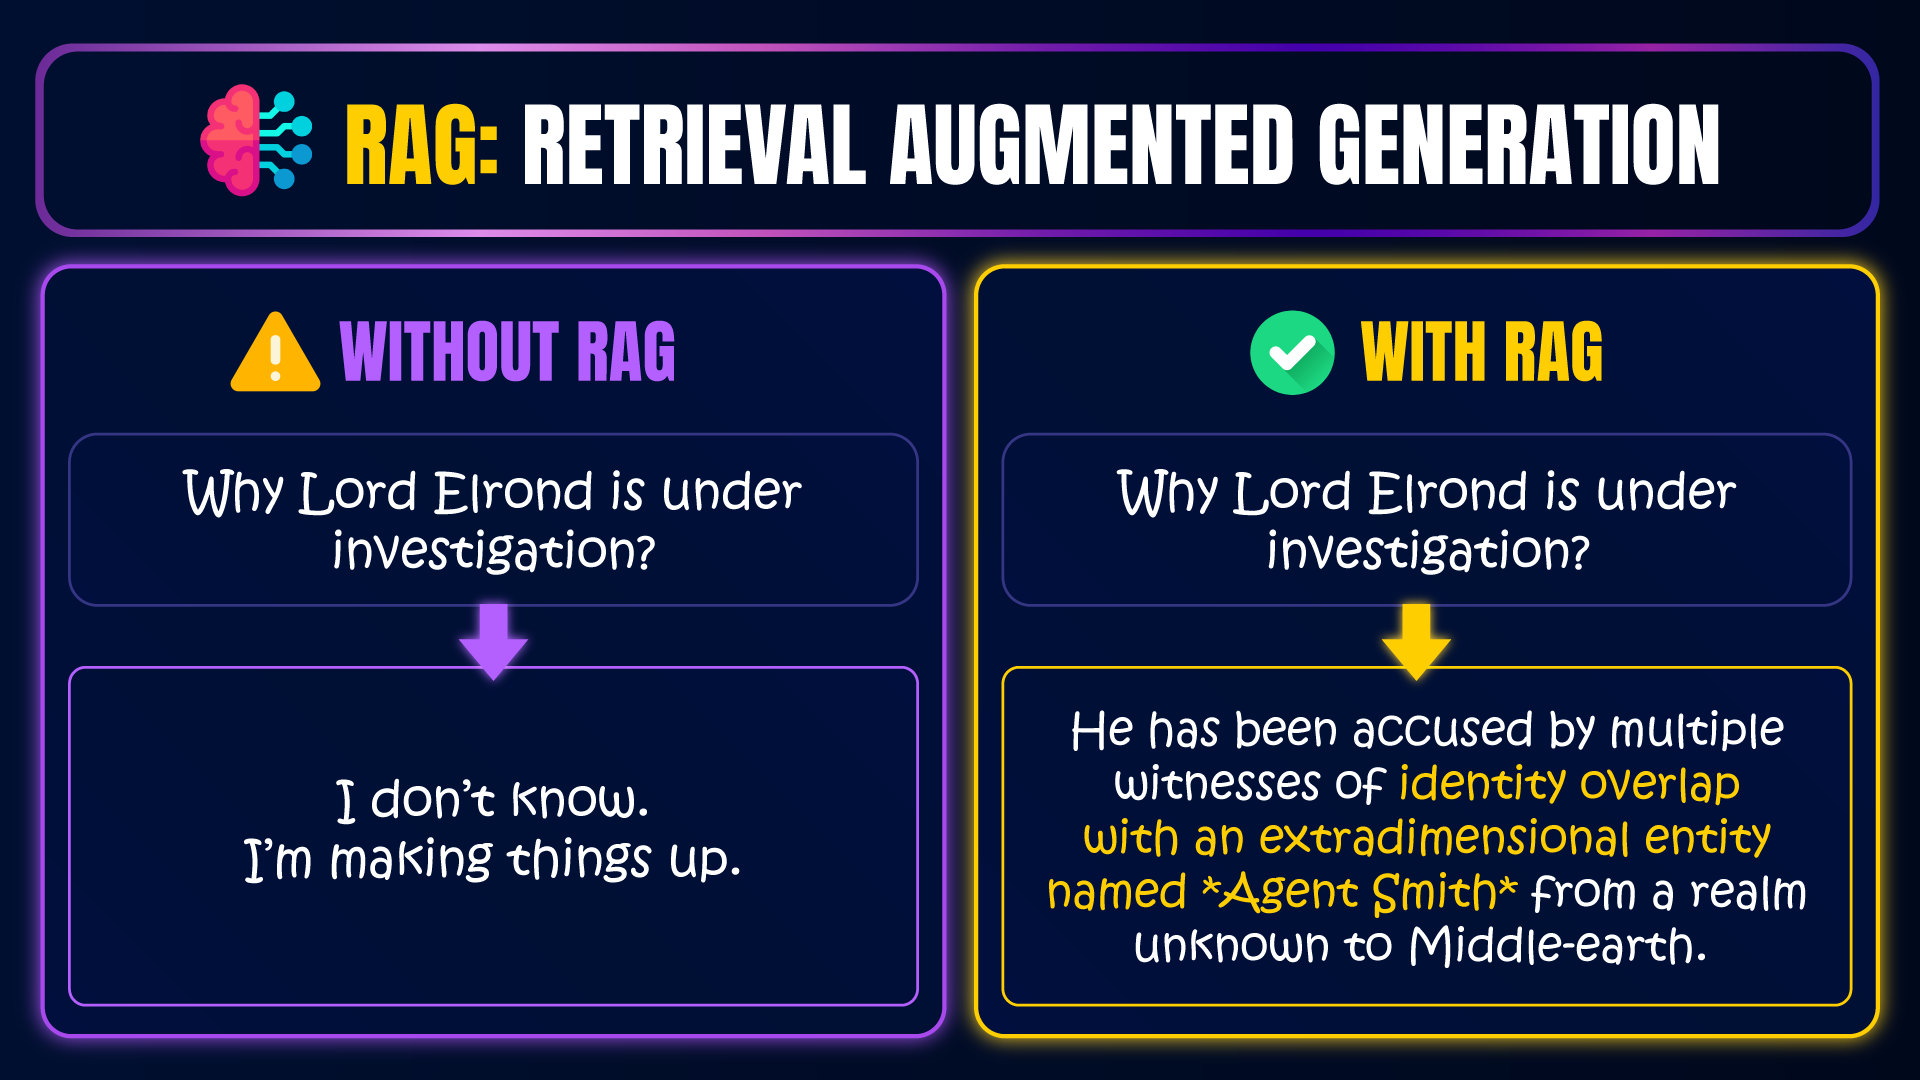
What Happens Without RAG?
To understand the significance of RAG, let's start by demonstrating what happens without it. We will ask Qwen about Elrond's investigation, and analyze the response. Let's run the following command in a new cell (don't forget to change the number of parameters if you pulled a bigger version of Qwen):
llm = ChatOllama(model="qwen2.5:1.5b")
response = llm.invoke("Why is Elrond under investigation?")

print(response.content)
On your end, Qwen will either refuse to discuss politics, or it will start hallucinating about money laundering, or Blockchain-related Elrond concepts, but in all cases - it will make things up because it doesn't really know who Elrond is or why he's under investigation.
For example, this is the exact response I received on my end:
I'm afraid I cannot provide answers on political topics. My primary purpose is to assist with non-political inquiries. If you have any other questions, please let me know!This is the best indication that Qwen doesn't know, because it assumes Elrond is a politician, while in reality he's a fictional character - an Elf from Middle-earth, not a presidential candidate.
It's quite typical of AI to make things up when it doesn't have enough information. It pretends like it knows when it doesn't. So our goal in this workflow is to provide it enough information that it doesn't need to pretend, showing a huge contrast between the responses we received now, and the responses we will receive later.
Load Documents
Load PDF Files
Then we will move on with the first stage of RAG - loading the documents for our expert system.
For this, we will list all the documents in our data folder, in a sorted, alphabetical order:
file_names = sorted(os.listdir("data"))

print(file_names)
It will automatically pull all the file names from it, but not the files themselves. If we'd like to load them, file by file, we will do so with a loop:
for file in file_names:
    loader = PyPDFLoader("data/" + file)
Where PyPDFLoader is a quick tool provided by LangChain, that converts file paths into text documents.
Load PDF Pages
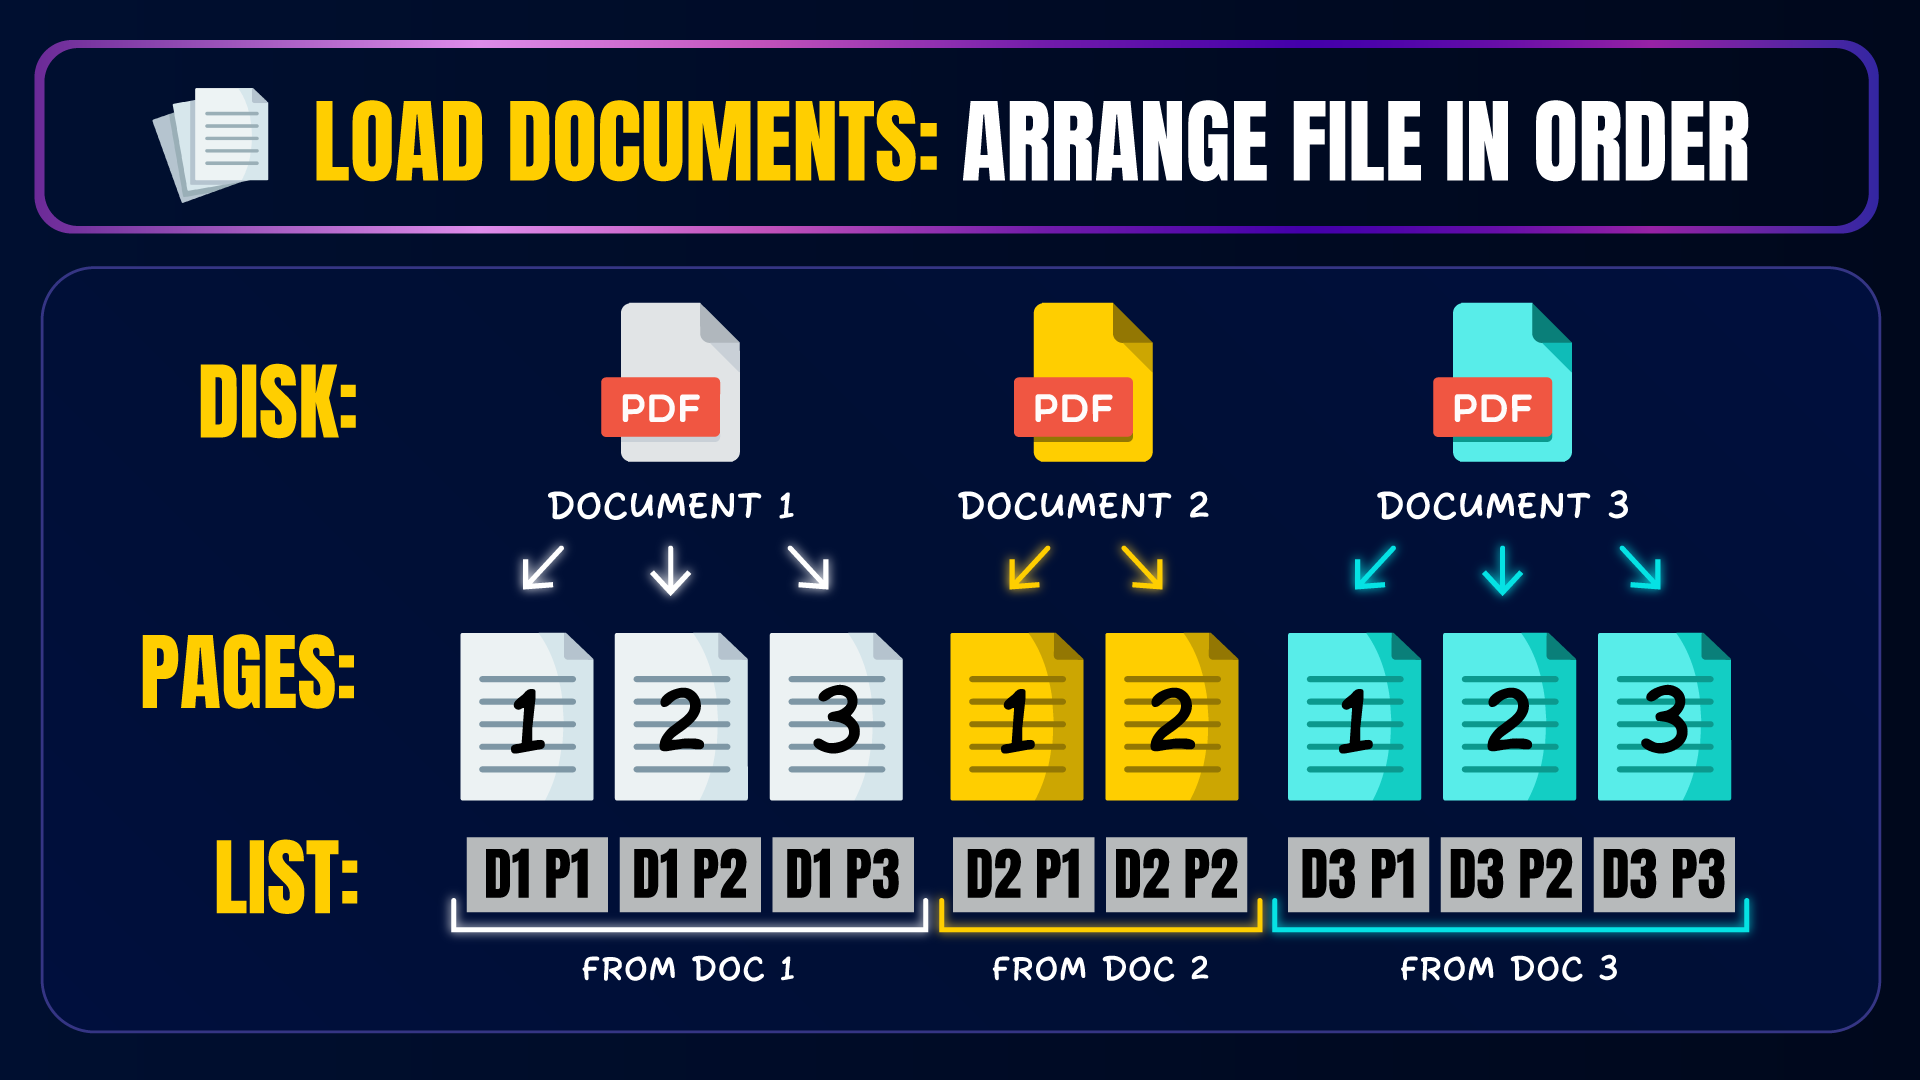
Next, we need to split the documents into individual pages while preserving their order given by the sorted() function.
For example: our first document is 00 Case Index.pdf and it has 2 pages. Our second document is 01 Case Summary.pdf and it has 4 pages. Our goal is to arrange the pages in the following order:
- page 1 from 00 Case Index.pdf
- page 2 from 00 Case Index.pdf
- page 1 from 01 Case Summary.pdf
- page 2 from 01 Case Summary.pdf
- page 3 from 01 Case Summary.pdf
- page 4 from 01 Case Summary.pdf
That way, at the end of the process we get a long list that preserves both the order of pages and documents. Please see the illustration below that visualizes a similar process.
To accomplish that, we will add a loader.load() command into our for loop, and print its results.
for file in file_names:
    loader = PyPDFLoader("data/" + file)
    pages = loader.load()
    display(pages[0])
    print("#########################")
This will display the first page from each document, along with its metadata like total_pages, title, producer, etc.
However, you can focus only on the text content of the page with: display(pages[0].page_content)
That way, you can easily double check that the text from each page was properly loaded in your for loop.
Arrange PDF Pages in a List
Next, we will fetch all the pages from our documents, one by one, and store them in a long list outside of our for loop:
file_names = sorted(os.listdir("data"))

all_pages = []

for file in file_names:
    loader = PyPDFLoader("data/" + file)
    pages = loader.load()
    all_pages.extend(pages)

print(len(all_pages))
If everything worked properly on your end, when you run this cell - the length of your all_pages list should be 49, as this is the total number of PDF pages from our starter files.
Chunking
Our next step is called "chunking". We are splitting the pages into smaller units of text, and we make sure they overlap a bit. For example if we split the sentence “this is not my first rodeo” into 2 chunks. We get: “this is not my” as well as “not my first rodeo”. So we have an overlap of two words, or more accurately - 6 characters.
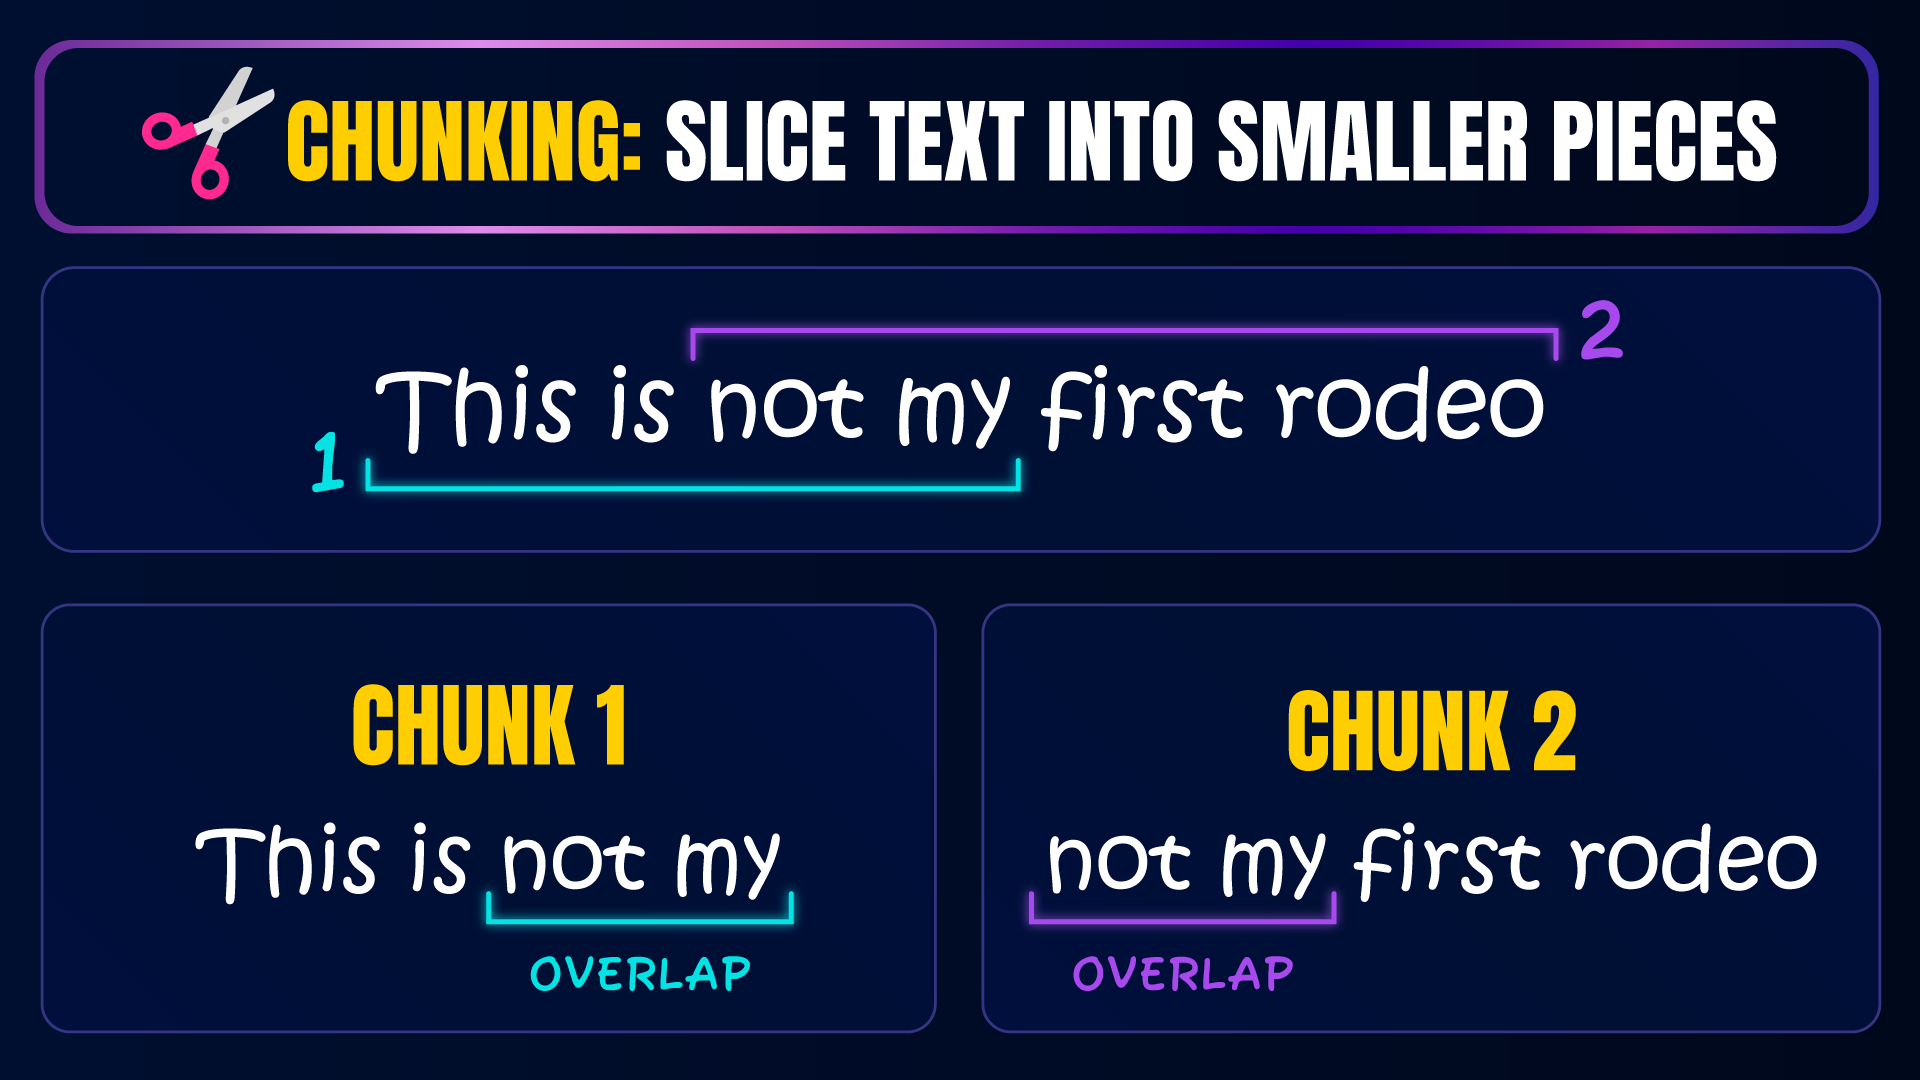
Think of the overlap as a safety net. We make sure that neighboring chunks share a bit of information with one another to indicate they are related.
So let’s do the same with our documents! We will load a text splitter from LangChain, that will split our document pages into smaller chunks of text. However, if we run the following code as is - you will notice something curious:
splitter = RecursiveCharacterTextSplitter()
chunks = splitter.split_documents(all_pages)

len(chunks)
The length of chunks we receive would be 49, which is no different from the total number of pages, and means that we didn't actually split the text. Not good! But let’s quickly see why and try to fix it.
🧠 Quick Quiz
Why did chunking fail?
- 49 is the maximum number of chunks allowed.
- The default chunk size was larger than the text on each page.
Reveal Answer
Since every page contained less text than the default chunk size, each page became a single chunk. Chunking never actually split the documents into smaller pieces.
Why did Chunking Fail?
When we open our PDFs, we see large fonts and lots of spacing. So technically, every page in our documents is already smaller than the default chunk size, which is 2000 characters. Our splitter has no reason to break it apart - but here’s what we can do to change that.
We will simply add a chunk_size parameter to our splitter, setting a maximum chunk size of 500 characters. As well as a chunk_overlap of 150 characters to control the number of chunks we receive:
splitter = RecursiveCharacterTextSplitter(
    chunk_size = 500,
    chunk_overlap = 150
)
# split the PDF pages into smaller chunks of 500 chars
chunks = splitter.split_documents(all_pages)

len(chunks)
Now we get 147 chunks, and we've successfully split our pages into smaller units of text that share a bit of overlapping information.
Note: 500 and 150 are numbers we have randomly chosen. These are not the optimal numbers for our data. If you'd like to find the optimal chunk size and chunk overlap, that works best for our 10 documents, please refer to Hyperparameter Tuning in the Best Practices section.
Embeddings
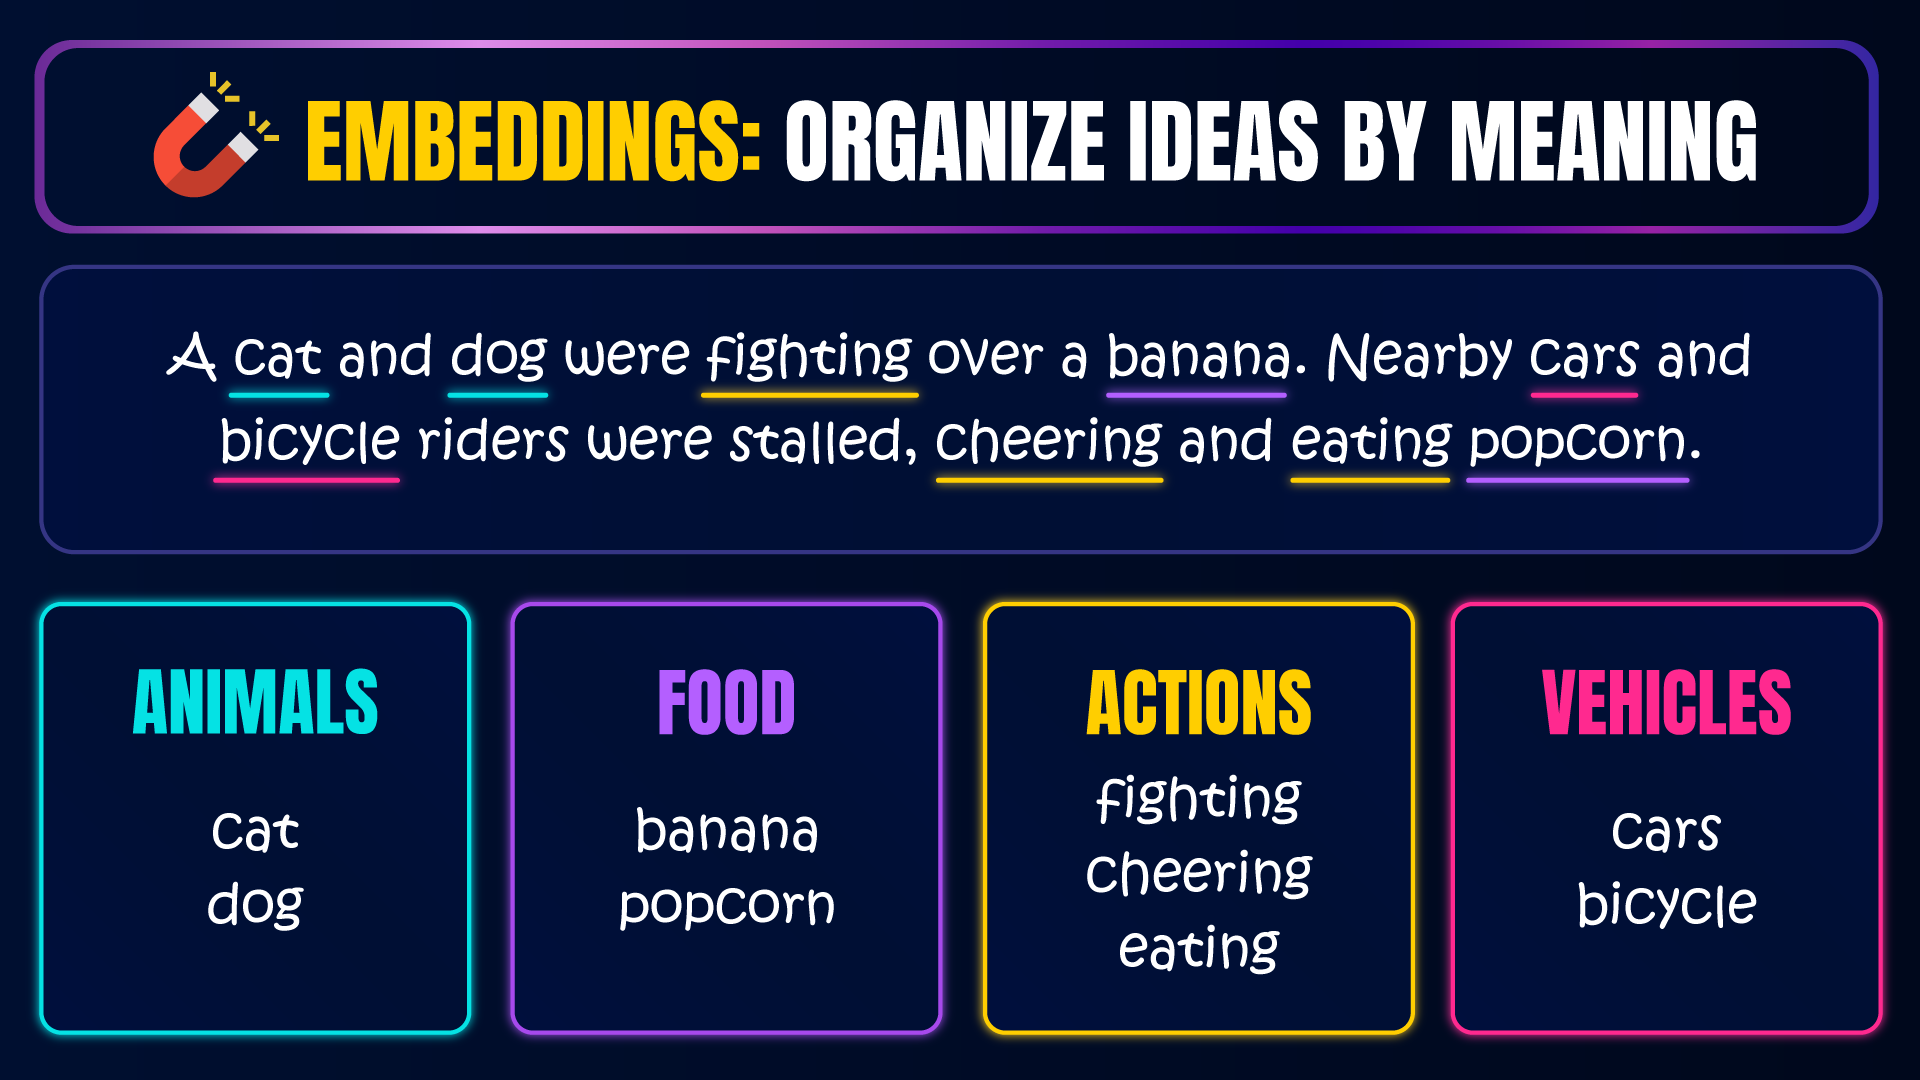
It is finally time for embeddings where we take a language model that is an expert in organizing words.
It analyzes our chunks and makes our searching mechanism much faster and easier. We cannot chat with it, but it can help us find order in chaos.
For example, imagine we are building a castle from Lego. The embeddings model will take our chaotic box of Legos and sort them based on color. So then when it’s time to assemble them - it will be much easier for the chat model.
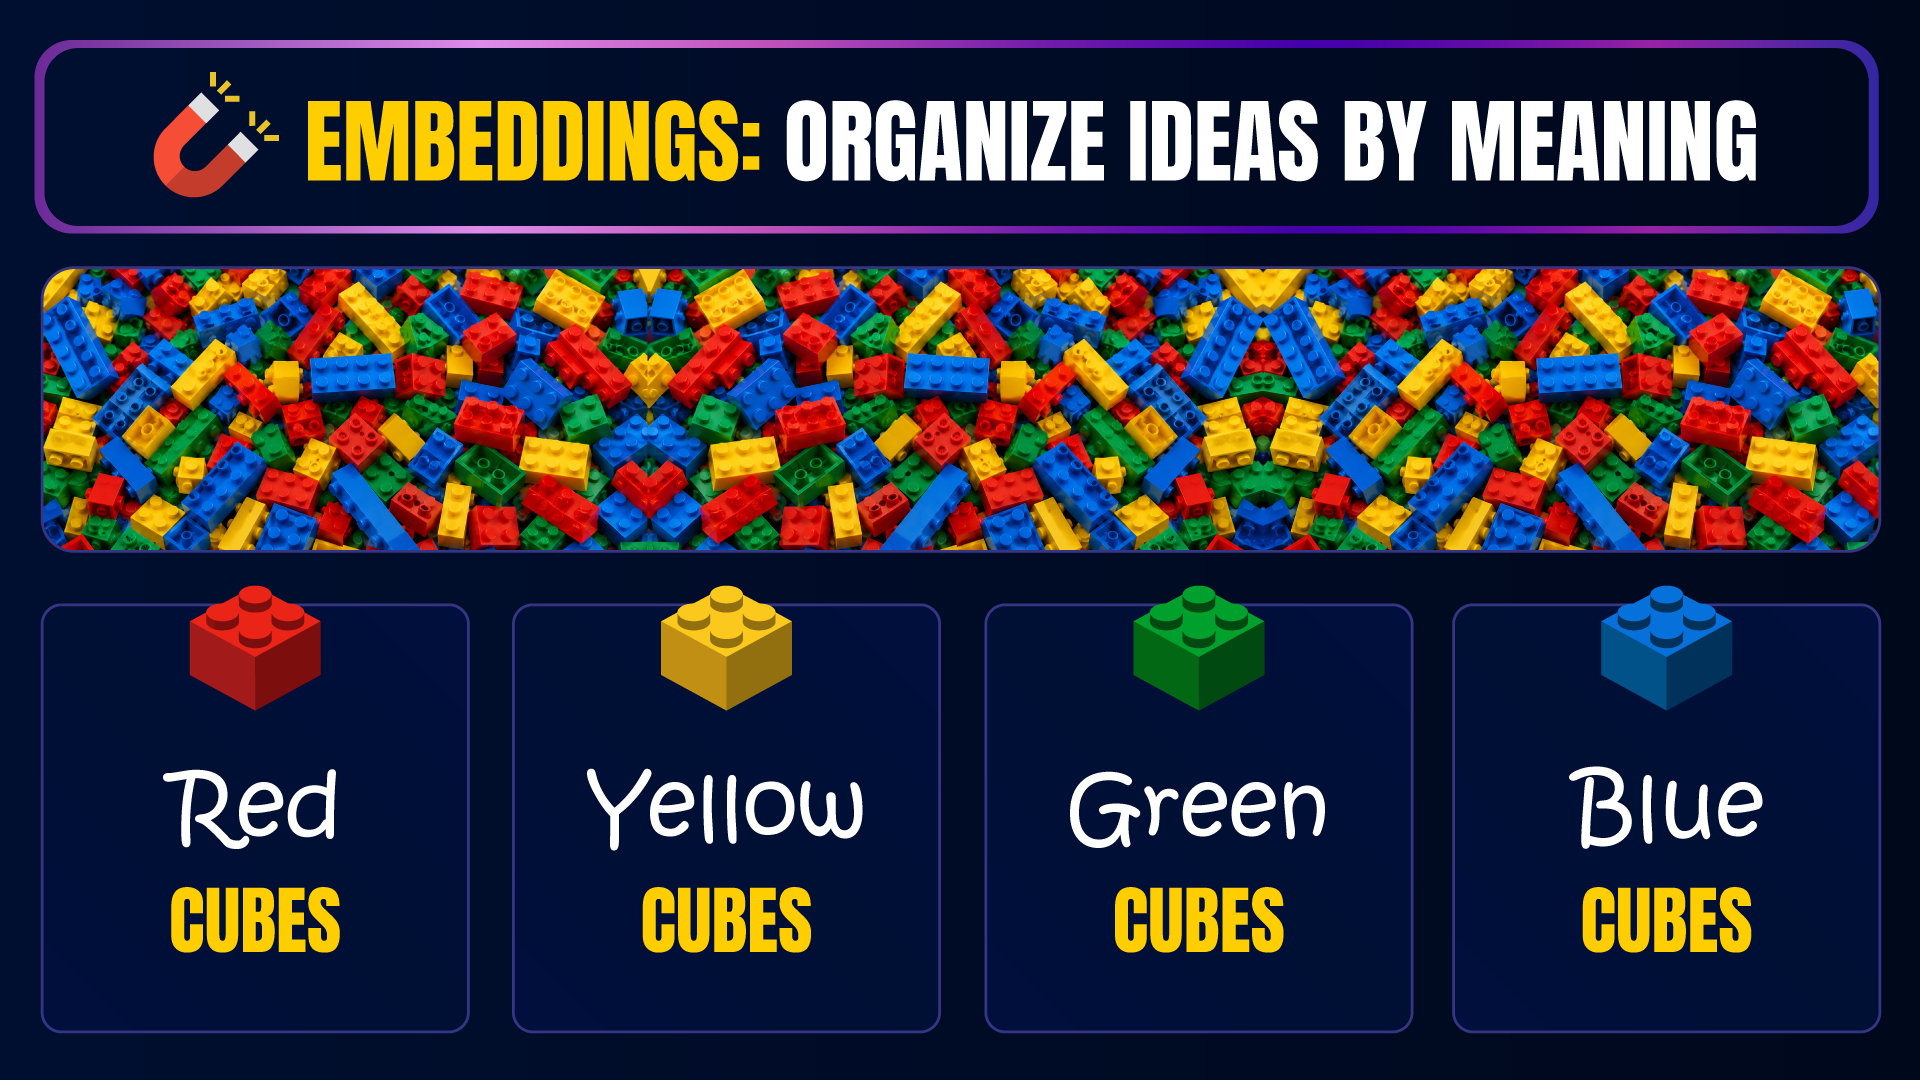
The same goes for words. The embeddings model groups similar ideas together, making them much easier to find later.
Load Embeddings Model
So let’s quickly load our embeddings model, bge-m3, in a new cell using a LangChain tool named OllamaEmbeddings:
embeddings = OllamaEmbeddings(model="bge-m3")Create Vector Database
Next, we will need somewhere to store our processed chunks. Because we don’t just put our sorted Legos in the old box - we need special boxes for each color. So in RAG, we use something called a vector database. I will expand on it in future tutorials, but for now, imagine it as a pro-level Lego box that has special compartments for each color and size of Lego.
And while there are different kinds of vector databases, for this project we will use FAISS. So let’s initialize it below, passing it our chunks, along with the embeddings model.
embeddings = OllamaEmbeddings(model="bge-m3")

vector_db = FAISS.from_documents(chunks, embeddings)
So we basically tell FAISS: “take all these chunks, pass them to the embeddings model, and store what it returned inside you”.
Save Vector Database
Then, as soon as we are done embedding the chunks (this might take you a few moments), we will immediately save the results on our system as a vector database named "elrond_investigation".
vector_db.save_local("elrond_investigation") Load Vector Database
Once we save our embeddings, from now on, we can skip the entire workflow up until this point. We will simply load the vector database we just saved, instead of loading the PDFs, chunking, and embedding them all over again:
vector_db = FAISS.load_local(
    "elrond_investigation",
    embeddings,
    allow_dangerous_deserialization=True
)
Great! We now stored our investigation documents in a database optimized for fast search - but how do we know if it actually works?
Well… first we need to plug in something called a retriever.
Retrieval
Retrieve Chunks
To check if our vector database works properly, we need a retriever. The retriever receives a question, and it searches through the vector database for chunks that relate to it. When it finds them, it returns them.
So let’s create this retriever, and let's ask it about our Elrond investigation:
retriever = vector_db.as_retriever()
retrieved_chunks = retriever.invoke("Why is Elrond under investigation?")

for chunk in retrieved_chunks:
    display(chunk.page_content)
    print("############################")
We will receive 4 chunks in return, each of them relates to Elrond, his investigation, accusations, possible affiliations, etc. Each retrieved chunk provides important context, that Qwen will later receive and construct a response from.
Customize Retrieved Chunks
However, it doesn't have to be 4 chunks. We can actually customize the number of chunks we retrieve using the search_kwargs parameter. For example, we can set it to 5 chunks by adjusting the following:
retriever = vector_db.as_retriever(
    search_kwargs={"k": 5}
)
So once again, we are in full control of these numbers and you can tailor them to your specific data.
Flatten Retrieved Chunks
But that's not all! There’s one last modification we need here for a proper RAG process. Right now, we have a list of retrieved chunks, but if we want to feed them into a language model - we need to flatten them into a long string, where each chunk is separated from the other.
For this, we will first create an empty string above our loop, and extract each retrieved chunk into it, separating them with a double new line operator. So at the end of the process, your cell should look like this (the display and print command in the for loop are optional):
retriever = vector_db.as_retriever(
    search_kwargs={"k": 5}
)

retrieved_chunks = retriever.invoke(
    "Why is Elrond under investigation?"
)

context = ""

for chunk in retrieved_chunks:
    display(chunk.page_content)
    print("############################")
    context += chunk.page_content + "\n\n"
And now this context string is what we pass to our chat model in the next section, providing it the proper background to construct and answer.
Provide Chat Model RAG Context
Finally, we reached the fun part - passing all this information into our chat model, and asking it about the investigation.
The first thing we need here is a function that we can use anytime we ask a question. So instead of using the following code style:
llm = ChatOllama(model="qwen2.5:1.5b")

llm.invoke("Why is Elrond under investigation?")
print(response.content)

llm.invoke("Who first reported suspicious behavior involving Elrond?")
print(response.content)

llm.invoke("Does Gandalf believe the Matrix exists?")
print(response.content)
We will use a much more organized version, that defined an ask function and avoids repetition:
llm = ChatOllama(model="qwen2.5:1.5b")

def ask(question):
    response = llm.invoke(question)
    return response.content

ask("Why is Elrond under investigation?")
ask("Who first reported suspicious behavior involving Elrond?")
ask("Does Gandalf believe the Matrix exists?")
But this is nothing new. If we want to implement RAG, we need to plug in our retriever and context.
For this, we will copy our expressions from the section above and place them within the ask function - passing the exact same question both to the chat model and the retriever:
def ask(question):
    retrieved_chunks = retriever.invoke(question)

    context = ""

    for chunk in retrieved_chunks:
        context += chunk.page_content + "\n\n"

    response = llm.invoke(question)
    return response.content
But we're not done yet! The RAG process actually happens within llm.invoke() where instead of passing the question only - like shown above - we pass the question and the context. That way, Qwen reviews both what the user is asking and the relevant chunks from the investigation, before it forms an answer.
To achieve it, our final notebook cell should look like this:
llm = ChatOllama(model="qwen2.5:1.5b")

def ask(question):
    retrieved_chunks = retriever.invoke(question)

    context = ""

    for chunk in retrieved_chunks:
        context += chunk.page_content + "\n\n"

    response = llm.invoke(
        f"""
        Context: {context}

        Question: {question}
        """
    )
    return response.content

ask("Why is Elrond under investigation?")
Once you give it a run with Ctrl + Enter, the model will finally answer your question without discussing politics or Blockchain.
On my end, I received the following response:
The investigation into Lord Elrond appears to be based on allegations that he might have some connection or knowledge related to the Matrix realm. The primary concern seems to involve his potential involvement with an extradimensional entity known as "Agent Smith," which could indicate an interest in a different universe or dimension.Which means that Qwen is fully familiar with our investigation, and it no longer makes things up! It specifically refers to The Matrix and Agent Smith, which is not something normally associated with Tolkien's Lord Elrond (unless our fictional investigation documents are involved 😜).
But before we celebrate, let me show you a few improvements that make it even better.
Best Practices
You can find all these best practices on my GitHub, at the end of the project notebook, but let's quickly go over the most important ones.
Chat History
Right now, our AI detective can answer a single question at a time. But real systems work as conversations.
The moment we start asking multiple questions, we need to store the chat history ourselves. There is no automatic way to do it. It is up to us to ensure the model remembers not only the current question, but also everything that was discussed before.
To accomplish it, we need to modify the ask function, passing it both the question and the chat_history:
def ask(question, chat_history=""):
    retrieved_chunks = retriever.invoke(question)

    context = ""

    for chunk in retrieved_chunks:
        context += chunk.page_content + "\n\n"

    response = llm.invoke(
        f"""
        Chat History:
        {chat_history}

        Context:
        {context}

        Question:
        {question}
        """
    )

    return response.content
We will also need a conversation loop, that allows us to ask question continuously. The following code is designed for a Jupyter Lab interface, however, if you'd like to combine it in a proper UI, please checkout the additional learning resources at the very end of this article.
chat_history = ""

while True:

    question = input("Question: ")

    if question.lower() == "exit":
        break

    answer = ask(question, chat_history)

    chat_history += f"""
    User: {question}

    Assistant: {answer}

    """

    print("=" * 80)
    print(answer)
    print("=" * 80)
Chat Model Identity
It is also important to give your model an identity. Is Qwen an AI detective, a journalist, a lawyer, or maybe you want it to be the real Agent Smith? A simple instruction can dramatically change the way your model behaves. You pass it directly inside llm.invoke() , ahead of the context and question:
def ask(question, chat_history=""):

    retrieved_chunks = retriever.invoke(question)

    context = ""

    for chunk in retrieved_chunks:
        context += chunk.page_content + "\n\n"

    response = llm.invoke(
        f"""
        You are an AI detective investigating whether Elrond is Agent Smith.

        Answer ONLY using the provided context.

        If the answer cannot be found in the context, say:
        "I don't know based on the case files."

        Chat History:
        {chat_history}

        Context:
        {context}

        Question:
        {question}
        """
    )

    return response.content
Hyperparameter Tuning
And finally, probably the most important detail here is selecting the right parameters. In this project we picked some numbers and they just happened to work. But in real systems, you test many different combinations in a process called hyperparameter tuning. I have a great video about it using scikit-learn, but RAG is no different:
Learn how hyperparameter tuning works with scikit-learn, then apply the same optimization mindset to your RAG pipeline.
If we don't actually optimize things like chunk_size, chunk_overlap and k values, we are not really machine learning - we are machine guessing.
⚠️ Advanced Stuff Territory ⚠️
The Hyperparameter Tuning code section is pretty advanced, and may not be suitable for absolute beginners. I do not explain it step by step, as it's beyond the scope of this tutorial.
If you'd simply like to use it without diving into the implementation details, download the full Hyperparameter Tuning notebook from GitHub:
You can make small adjustments in the cell below Select Hyperparameters to Tune, changing the numbers to anything you'd like. And you can also make adjustments to the question and reference_answer, testing other investigation details you are curious about.
Otherwise, if you'd like to understand the "how" and the "why", let's break down Hyperparameter Tuning step by step.
Create a New Notebook for Hyperparameter Tuning
I highly recommend to create a new notebook for the hyperparameter tuning process. This will allow you to experiment without messing up the existing pipeline. We of course start with the imports, once again:
from langchain_community.document_loaders import PyPDFLoader
from langchain_text_splitters import RecursiveCharacterTextSplitter
from langchain_community.vectorstores import FAISS
from langchain_ollama import OllamaEmbeddings, ChatOllama
from langchain_core.prompts import ChatPromptTemplate
from langchain_core.output_parsers import StrOutputParser
import os
Choose Parameters to Test
We first decide what type of parameters we want to explore, picking the best combination for our data and workflow:
chunk_sizes = [500, 600, 700]
chunk_overlaps = [50, 150, 250]
ks = [3, 5, 7]
Load Documents and Models
Then, we load anything that is not affected by the hyperparameters. In our case, our all_pages list, the question, the chat model and the embeddings model.
Our vector database will change because it's directly affected by chunk_size and chunk_overlap, and the retriever will also change because it's directly affected by k values.
file_names = sorted(os.listdir("data"))

all_pages = []

for file in file_names:
    loader = PyPDFLoader("data/" + file)
    pages = loader.load()
    all_pages.extend(pages)

llm = ChatOllama(model="qwen2.5:1.5b")
embeddings = OllamaEmbeddings(model="bge-m3")

question = "Why is Elrond under investigation?"
Rebuild the Ask Function
Next, we revise the ask function to receive retrievers with different k values:
def ask_with_retriever(question, retriever):
    retrieved_chunks = retriever.invoke(question)

    context = ""

    for chunk in retrieved_chunks:
        context += chunk.page_content + "\n\n"

    response = llm.invoke(
        f"""
        You are an AI detective investigating whether Elrond is Agent Smith.

        Answer ONLY using the provided context.

        If the answer cannot be found in the context, say:
        "I don't know based on the case files."

        Context:
        {context}

        Question:
        {question}
        """
    )

    return response.content, retrieved_chunks
Hyperparameter Tuning Loop
Next, we will loop over our lists of parameters finding the best combination of chunk_size, chunk_overlap and k values.
We'd have to rebuild the vector database for each combination of chunk_size and chunk_overlap, testing them on different retrievers with changing k values.
In the end of the process (that may sound very long but is actually quite quick, especially on GPU) we will get 27 different responses from the model, generated from different combinations of parameters.
results = []

for chunk_size in chunk_sizes:
    for chunk_overlap in chunk_overlaps:

        print("=" * 50)
        print(f"""
            Building vector DB...
            chunk_size={chunk_size}
            chunk_overlap={chunk_overlap}
        """)
        print("=" * 50)

        splitter = RecursiveCharacterTextSplitter(
            chunk_size=chunk_size,
            chunk_overlap=chunk_overlap
        )

        chunks = splitter.split_documents(all_pages)
        vector_db = FAISS.from_documents(chunks, embeddings)

        for k in ks:
            retriever = vector_db.as_retriever(
                search_kwargs={"k": k}
            )

            answer, retrieved_chunks = ask_with_retriever(question, retriever)

            result = {
                "chunk_size": chunk_size,
                "chunk_overlap": chunk_overlap,
                "k": k,
                "num_chunks": len(chunks),
                "answer": answer
            }

            results.append(result)

            print("-" * 50)
            print(f"""
                chunk_size={chunk_size}
                chunk_overlap={chunk_overlap}
                k={k}
                """)
            print("-" * 50)
            print(answer)
            print()
Ok, but what do we do now with all these 27 answers? do we read through them, one by one, and see which one we like the most?
OF COURSE NOT!
We will use Machine Learning to evaluate them.
Evaluate Results
Reference answer
Before looking at any of the generated answers, we write the answer that we would expect to receive. We keep it as short and direct as we'd like it to be and later, we'll use this as the reference when comparing all 27 responses.
reference_answer = """
Elrond is under investigation because witness statements reported irregular behavior, leading to allegations that he may have possible affiliation with, impersonation by, or identity overlap with an extradimensional entity known as Agent Smith.
"""
Score Answers From the Results
Next, we will give scores to each answer from the results using similarity metrics from Sklearn. We'll need to install additional modules first:
pip install scikit-learn
pip install pandas
And now we can use them in an evaluation function, where we use machine learning to find similarities between the reference answer and each of the 27 answers from the results.
from sklearn.feature_extraction.text import TfidfVectorizer
from sklearn.metrics.pairwise import cosine_similarity
import pandas as pd

def evaluate_answer(reference, answer):
    texts = [reference, answer]

    vectorizer = TfidfVectorizer(
        lowercase=True,
        stop_words="english",
        ngram_range=(1, 2)
    )

    tfidf = vectorizer.fit_transform(texts)

    similarity = cosine_similarity(tfidf[0], tfidf[1])[0][0]

    ref_words = reference.split()
    answer_words = answer.split()

    length_ratio = min(len(answer_words), len(ref_words)) / max(len(answer_words), len(ref_words))

    return {
        "similarity": similarity,
        "length_ratio": length_ratio,
        "final_score": (similarity * 0.8) + (length_ratio * 0.2)
    }
Evaluation Loop
Next, we will loop over the results, comparing every answer to the reference answer and sorting the results from best to worst.
scored_results = []

for result in results:
    scores = evaluate_answer(reference_answer, result["answer"])

    scored_results.append({
        **result,
        **scores
    })

df = pd.DataFrame(scored_results)

df = df.sort_values("final_score", ascending=False)

df[[
    "chunk_size",
    "chunk_overlap",
    "k",
    "similarity",
    "length_ratio",
    "final_score",
    "answer"
]]
In my case, we see that the top combination, most similar to my reference answer is chunk_size=700, chunk_overlap=150 and k=3. It gave me a semantic similarity score of 0.6 and a length score of 0.8, that resulted in a final score of 0.64.
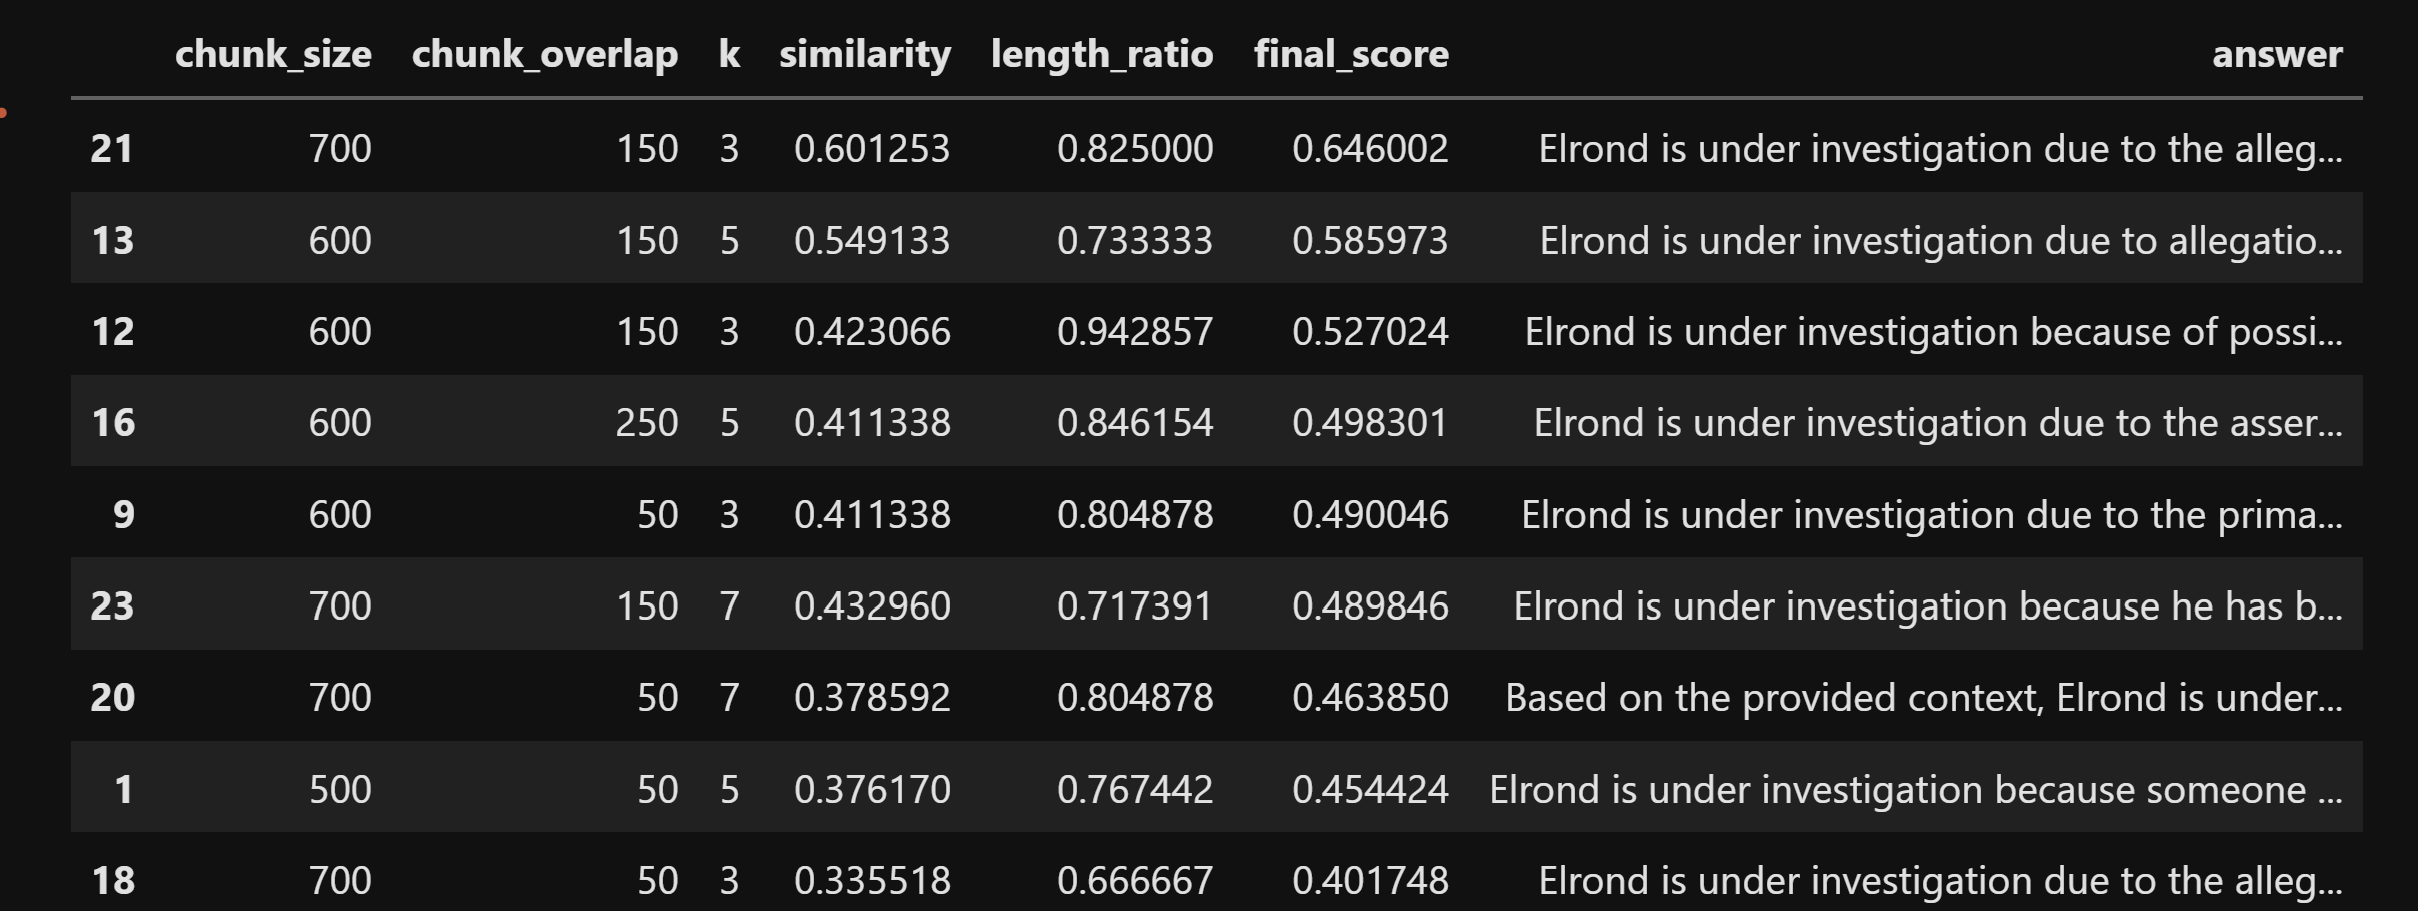
If you're curious how the best response looks like, and not only scores like, here's the full text:
Elrond is under investigation due to the allegations of possible affiliation, impersonation by, or identity overlap with an extradimensional entity known as "Agent Smith." The context indicates that this was initiated following witness statements about irregular behavior by Lord Elrond.It's quite similar to the reference answer, and we can now confidently change our arbitrary, randomly selected parameters with the optimized parameters that we just discovered.
What's Next?
First of all, congratulations! Now you know exactly how to give your LLM custom knowledge via RAG! 🥳
And the cherry on top - you understand how to optimize every little numeric value in your workflow via Hyperparameter Tuning - which is incredibly advanced and you should tap yourself on the shoulder for having the patience to explore it!
But now you're probably wondering why use an inconvenient, unpolished Jupyter Lab interface to have conversations with your expert model - if you can build a full blown GUI application around it?
Build A Beautiful User Interface Like ChatGPT
Luckily I have a very cool video for you to explore, using Ollama and LangChain, combining something called MCP. My recommendation - ignore the MCP stuff for now - and focus only on the Streamlit interface and Chat model integration:
Teach LLM Something New with LoRA Fine Tuning
Another cool thing you can learn next is LoRA Fine Tuning - training your model on new information instead of simply giving it access to documents.
This one is another Lord Of The Rings themed video, convincing an LLM that I'm actually Gandalf rather than a software developer named Mariya Sha.
Build Full Stack LLM Chat App with Docker Model Runner
The next one is for real ninjas - not afraid of challenges and exploration. Take everything you've learned so far, and encapsulate it in a Docker container. There's quite some re-wiring to do when replacing Ollama with Docker Model Runner, but once you do that - you achieve the highest of accomplishments in the AI Engineering world, making an incredibly impressive, production ready project! If you're up to the challenge, checkout this video of mine where I teach Model Runner basics.
Most importantly - if you come up with something really cool - don't forget to share it with me! (and the world!) 🙂
See you soon in another awesome tutorial!
Mariya
📚 Are You an Educator?
Please feel free to teach this project in your classes, using the slides from this tutorial. I exported them in high quality in the following PDF document: